Upgrading your floors is one of the most exciting home renovation projects you can undertake. Whether you are replacing worn-out carpet with sleek hardwood or installing durable luxury vinyl plank, new flooring completely transforms the aesthetic and comfort of your living space. However, before the installation crew arrives at your doorstep with their tools and materials, there is a crucial phase that homeowners must handle: preparation. Preparing your home properly ensures the project goes smoothly, protects your belongings, and helps the crew work efficiently.
Getting ready for a major home upgrade involves more than just clearing the room. To prevent unexpected delays, it is highly beneficial to understand the professional flooring installation process so you can align your home preparation steps with the installers’ timeline. When you know what to expect from the crew, you can systematically address every detail from furniture removal to climate control, ensuring a seamless transition.
By taking the time to prepare your space beforehand, you minimize the risk of damage to your home and reduce the overall stress of the renovation. Here are the essential home renovation flooring tips to help you get your space ready for a successful installation.
Clear the Workspace and Establish Access Routes
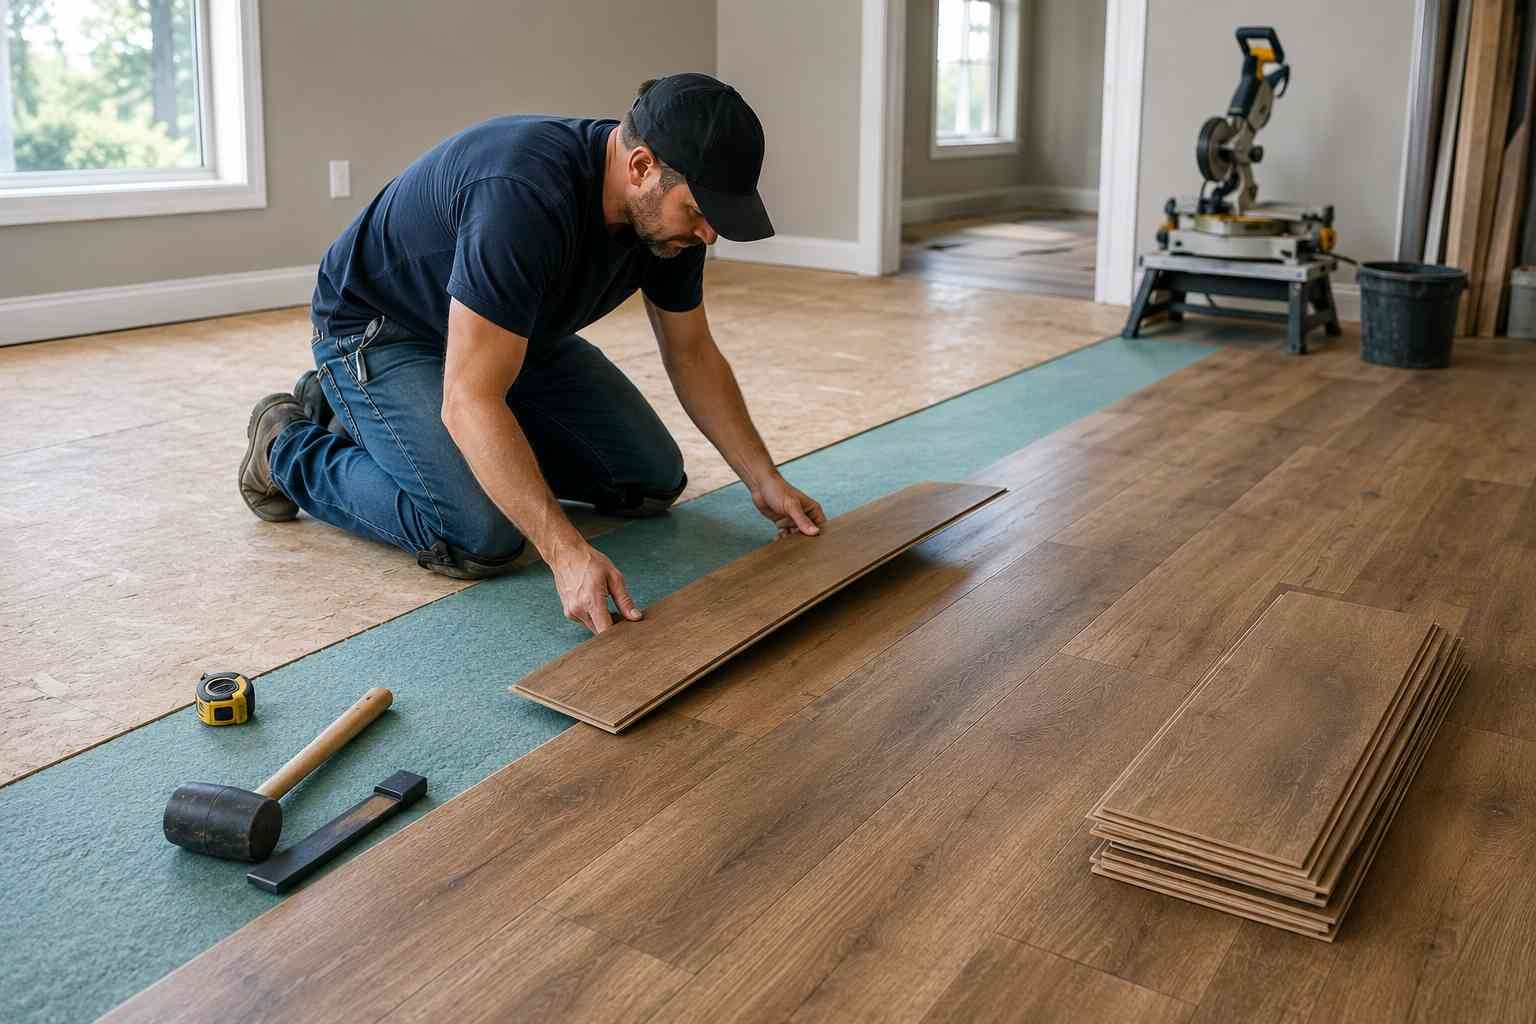
The first and most obvious step in preparing for flooring installation is removing everything from the designated rooms. Professional installers need a completely empty canvas to work on.
Start by moving all furniture, electronics, and decorative items to another part of the house. Do not forget to empty closets if they are getting new floors. Remove all wall hangings, low-hanging draperies, and fragile items from the area, as the vibrations from cutting and nailing can cause things to shake and fall. Additionally, ensure there is a clear, unobstructed path from the entryway of your home to the work zone so the installers can safely transport heavy materials back and forth.
Maintain Climate Control and Material Acclimation
Many homeowners do not realize that temperature and humidity play a massive role in the success of a flooring project. Wood, laminate, and even some vinyl products need time to adjust to the environment of your home before they are laid down.
Ensure your heating, ventilation, and air conditioning systems are running at normal operating temperatures for at least 48 to 72 hours before the installation. Keep the relative humidity within the manufacturer’s recommended range. Having the materials delivered a few days early allows them to acclimate to these conditions, preventing future issues like warping, gapping, or buckling.
Prepare for the Subfloor Inspection
The quality of your finished floor depends heavily on what lies underneath it. While the installers will handle the final preparation, you should conduct a preliminary subfloor inspection guide review.
Walk around the room and note any squeaks, dips, or soft spots in the existing subfloor. If you are removing the old flooring yourself, ensure the subfloor is clean, dry, and free of old staples, adhesive, or debris. A level, structurally sound subfloor is essential to prevent shifting and noise later on. Point out any areas of concern to your project manager during their initial walk-through.
Protect Your Walls and Baseboards
Flooring installation is a heavy-duty physical process. Even the most careful crew can accidentally scuff walls or nick baseboards.
To protect your paint job, consider removing baseboards and shoe moldings before the installers arrive. If you plan to reuse them, pry them off gently and label them so they can be reinstalled in the correct spots. If you prefer to leave them on, be prepared to do minor paint touch-ups once the project is finished. You can also apply painter’s tape along the bottom of the walls for an extra layer of defense.
Create a Comprehensive Flooring Project Checklist
To keep your project organized and ensure nothing is overlooked, use this simple checklist as your guide:
* Remove all furniture, appliances, and breakables from the work area.
* Empty closets and remove low-hanging clothes or shelves if necessary.
* Take down curtains, wall art, and fragile decor in adjacent rooms.
* Set your thermostat to standard living conditions to acclimate materials.
* Clean the subfloor of dust, dirt, and adhesive residue if doing DIY demolition.
* Secure pets in a safe, quiet room away from the noise and open doors.
* Designate a specific parking area and workspace for the installation crew.