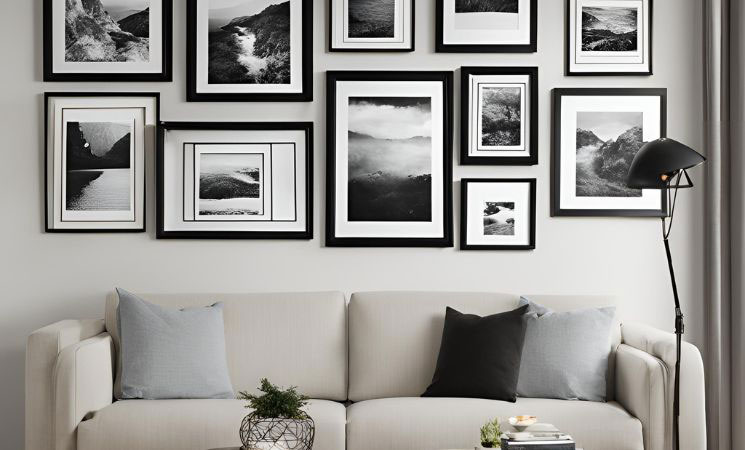
Creating a gallery wall is an art form in itself. Whether you have a collection of cherished photographs, vibrant paintings, or inspiring prints, how you arrange them on your wall can transform your space. A well-designed gallery wall not only showcases your taste but also adds depth, character, and warmth to your home. This guide will explore creative ways to arrange framed art, offering tips and ideas to help you craft a visually appealing and personalized gallery wall.
1. Planning Your Gallery Wall
Before you start hanging frames, planning is crucial. Consider the following:
- Space Assessment: Measure the wall space you want to dedicate to your gallery. Ensure it complements the room’s overall layout, avoiding overcrowding or leaving too much empty space.
- Theme Selection: Decide on a theme or style. Whether it’s a mix of contemporary and vintage pieces, black-and-white photography, or vibrant abstract prints, having a cohesive theme can tie the wall together beautifully.
- Frame Uniformity: Choose whether you want uniform frames for a clean, streamlined look, or a mix of different frames for a more eclectic vibe. Uniform frames provide a sense of order, while varied frames add a touch of creativity and informality.
2. Creative Layout Ideas
Once you’ve planned the basics, it’s time to think about layout. Here are some creative ideas:
- The Grid Layout: Perfect for a clean and organized look. Arrange frames of identical sizes in a grid pattern. This layout works well for minimalist interiors, giving a structured yet artistic feel.
- The Asymmetrical Layout: For a more dynamic and less formal appearance, try an asymmetrical layout. Mix different sizes and shapes, but keep a consistent spacing between each frame. This layout allows for flexibility and creativity, making it ideal for showcasing a diverse collection of art.
- The Central Anchor: Choose one large piece as the central anchor, and arrange smaller frames around it. This layout draws attention to the main piece while creating a balanced and harmonious display.
- The Vertical Stack: Ideal for narrow wall spaces or hallway decor. Stack frames vertically, either symmetrically or with varied sizes. This approach adds height and interest to tight spaces.
- The Salon Style: Inspired by traditional art salons, this layout involves filling an entire wall with frames from floor to ceiling. It’s a bold statement that works best in larger spaces, giving the room an art gallery-like feel.
3. Mixing and Matching Styles
A gallery wall doesn’t have to be monotonous. Mixing different styles can create a more personalized and intriguing display:
- Mixing Media: Combine paintings, photography, and other art forms like textiles or three-dimensional objects. This adds texture and interest, making the wall a focal point in the room.
- Color Coordination: While mixing different art styles, maintain a cohesive color palette. This could mean using similar tones in different pieces or contrasting colors that complement each other well.
- Frame Variations: Don’t be afraid to mix different frame styles—metallic, wooden, or colored. Varied frames can add depth and texture to the display, especially when the art pieces vary widely in style.
4. Incorporating Personal Elements
Make your gallery wall a reflection of your personality by incorporating personal touches:
- Photographs and Mementos: Mix art prints with personal photographs or memorabilia. This combination not only showcases your taste in art but also tells your personal story.
- Rotating Displays: Keep your gallery wall fresh by rotating pieces periodically. You can swap out prints based on seasons, moods, or new acquisitions. This keeps the display dynamic and continually interesting.
- Quotes and Typography: Integrate framed quotes or typography that resonate with you. These can be inspirational, humorous, or meaningful phrases that add a personal touch to the gallery.
5. Installation Tips
Once you’ve decided on your layout and content, it’s time to install your gallery wall. Here are some practical tips:
- Mock Layout: Before committing to nails, lay out the frames on the floor or use paper cutouts taped to the wall to visualize the final arrangement. This allows you to adjust spacing and alignment easily.
- Proper Spacing: Maintain consistent spacing between frames, typically around 2-3 inches. Consistency in spacing helps the wall appear cohesive and professionally arranged.
- Use of Tools: Invest in a level, measuring tape, and good quality picture hangers or wall hooks. Proper tools ensure your frames are hung straight and securely.
- Hanging Art at Eye Level: As a general rule, the center of your gallery wall should be at eye level, around 57-60 inches from the floor. This makes the display easy to view and appreciate.
6. Final Touches
After hanging your framed art, step back and view the wall from different angles. Make sure it feels balanced and visually appealing. Lighting also plays a significant role in highlighting your gallery wall. Consider using picture lights, spotlights, or even natural light to enhance the display.
Creating a gallery wall is a rewarding way to personalize your home with framed art. It’s an opportunity to showcase your style, interests, and personality while adding beauty and character to your living space. Whether you prefer a structured grid or an eclectic mix, the possibilities are endless. With thoughtful planning and creativity, your gallery wall can become the centerpiece of your home decor, transforming a blank wall into a captivating work of art.


